WebDAV/SFTP – Client programs (Admin)
WebDav is available in netfiles Data Room Professional and Premium, and SFTP is available in netfiles Data Room Premium.
Please note:
SFTP must first be activated for your data room by netfiles Support and WebDAV must be activated by the administrator in the data room settings under “Navigation”. WebDAV or SFTP can then be enabled individually for each user in the user properties.
In addition to the netfiles integration in Windows via WebDAV or SFTP, you can also use a WebDAV or SFTP client to upload/download files and create folders in the netfiles data room.
The following clients have been tested by us with netfiles. We cannot guarantee the correct functioning of other WebDAV and SFTP clients.
WebDAV clients
| Operating system | software | Drive integration | Compatibility |
| Windows 7 | Mount network drive | Yes | OK * |
| Windows 10 | Mount network drive | Yes | OK * |
| Windows 7-10 | Webdrive | Yes | OK |
| Windows 7-10 | Total Commander | Yes | OK |
| Mac OS X | Finder | Yes | Download only |
| Mac OS X | Mountain Duck | Yes | Download only |
| Mac OS X | CyberDuck | No | OK |
| Linux | KDE KNetAttach | Yes | OK |
| Android | Total Commander WebDAV Plugin | No | OK |
| Android | Ghost Commander WebDAV Plugin | No | OK |
| Windows | WinSCP | No | OK |
* Instead of editing Office documents directly on the network drive, we recommend editing them directly in netfiles
* iOS users can also access their netfiles data rooms via the official netfiles iPad app. Offline file access is also possible.
SFTP Clients
| Operating system | software | Drive integration | Compatibility |
| Windows 7-10 | Webdrive | Yes | OK |
| Windows 7-10, Mac OS X, Linux | Filezilla | No | OK |
| Mac OS X | CyberDuck | No | OK |
| Mac OS X | Mountain Duck | Yes | OK |
| Linux | KDE KNetAttach | Yes | OK |
| Unix, MacOS, Windows | sftp (Command line tool) | No | OK |
| Unix, MacOS, Cygwin | lftp (Command line tool) | No | OK |
| Unix | Gnome VFS | OK | OK |
| Android | Turbo Client | No | OK |
| Android | Total Commander SFTP Plugin | No | No |
| Android | Ghost Commander SFTP Plugin | No | No |
Set up
Setting up SFTP General
As soon as SFTP has been activated in a data room and a user as described above, the SFTP address is visible in the personal “Options”.
Click on your name at the top right and then on “Security”, under “API access” you will see your SFTP login address (you can copy the address by clicking on the two small boxes).
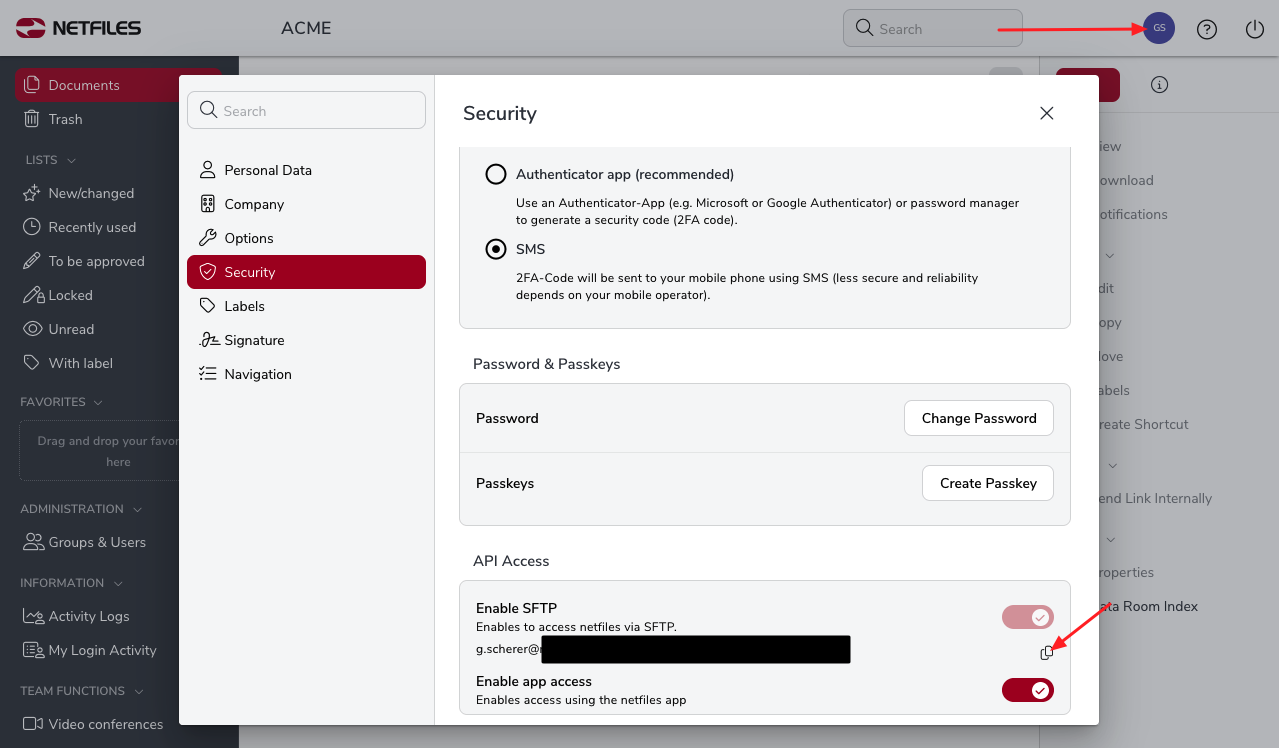
You can see the most important connection data from the link: User name, server name, port and path. Finally, you will need your password.
- Server: netfiles.de
- Port: A non-standard port
- Username: yourusername
- Path: /datenraumVertragsname/projectfiles
Important notes:
- Most company networks restrict outgoing connections and block the ports. Since the SFTP server uses a non-standard port, permission from the company IT department is often required because this port is very often blocked.
- Passwordless authentication is possible. To do this, store your OpenSSH-formatted public key in /.ssh/authorized_keys
Setup WebDAV CyberDuck
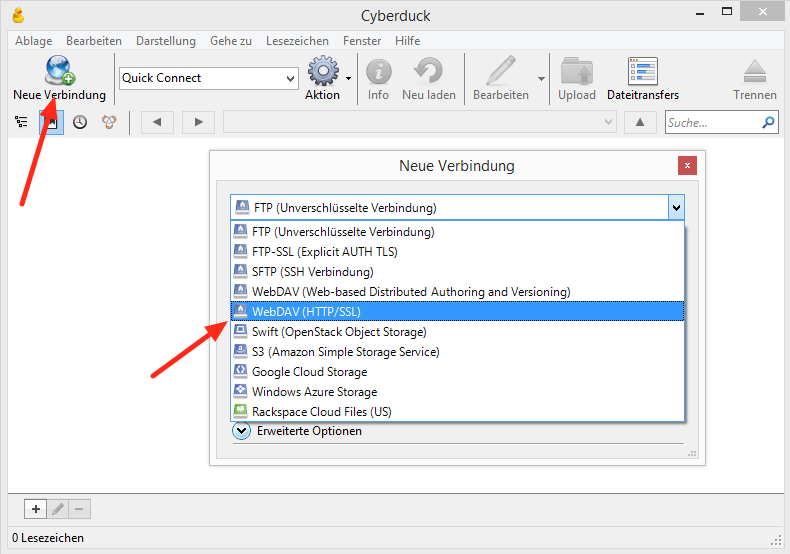
The setup in the CyberDuck Client is described briefly below as an example:
1. click on “New connection”
2. select “WebDAV (HTTP/SSL)” in the following dialog
3. copy the WebDAV network address that you find in netfiles on your personal start page into the “Server” field after you have activated WebDAV in netfiles (“Navigation” data room settings and “Security” in the personal user settings by clicking on your name).
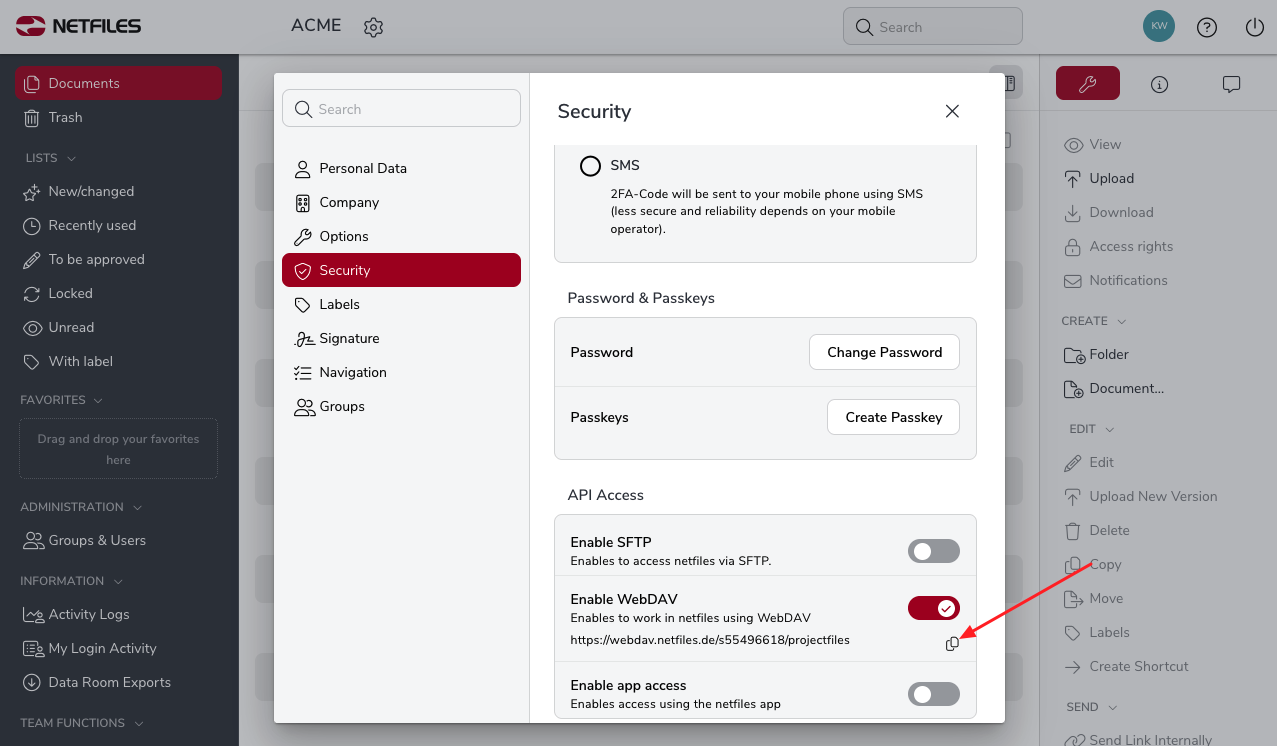
Then enter your netfiles user name and password and deactivate the “Anonymous login” option.
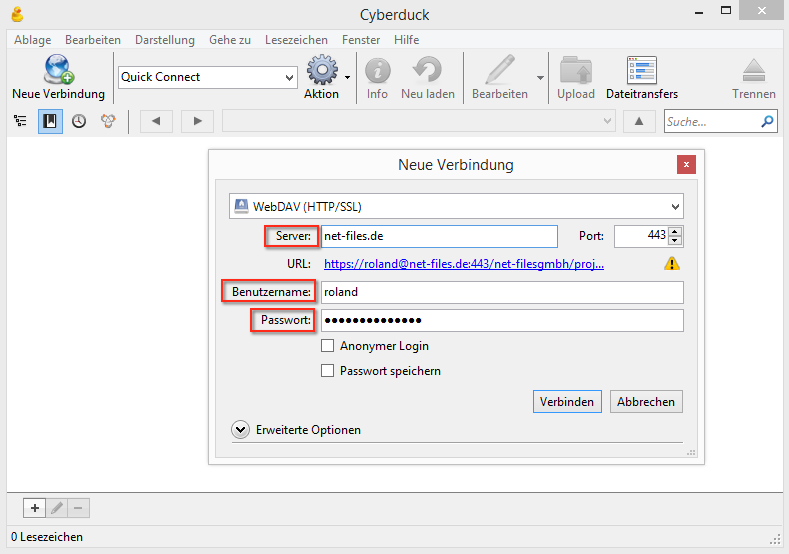
Click on “Connect”.
Setting up SFTP with Cyberduck
Setting up SFTP is very similar to this. Here is an example of the configuration of a new bookmark in Cyberduck.
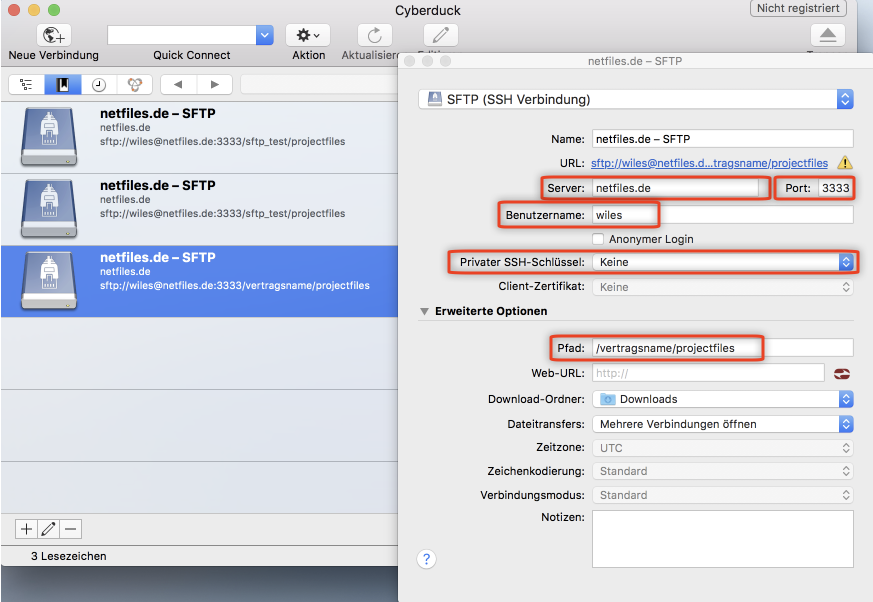
- Server: netfiles.de
- Port: A non-standard port
- Username: yourusername
- Private SSH key: none
- Path: /datenraumVertragsname/projectfiles
If you have any questions about setting up or operating SFTP and WebDAV, please contact our support team.
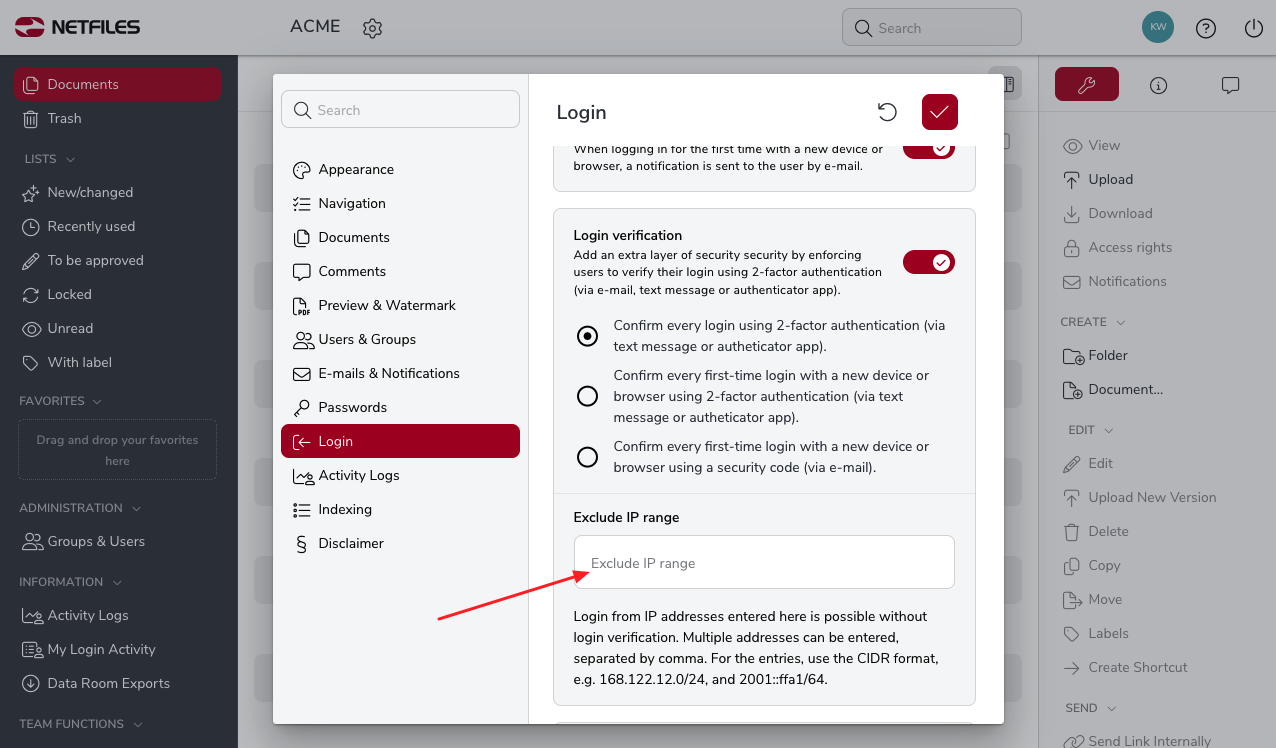
If the SFTP or WebDav interface is activated in the data room and you would also like to work with 2-factor authentication, please enter the IP address in the data room settings under “Login” in the “Exclude IP range” field.