WebDAV – netfiles integration in Windows
This feature is available in netfiles Data Room Professional and Premium.
netfiles can be integrated directly into Windows using WebDAV, so that files can be uploaded and downloaded directly from Windows Explorer or Windows.
Activation
These steps must be taken by the data room administrator in order to use WebDAV:
- In the data room settings under “Navigation ‘, activate the ’Allow WebDAV” checkbox for the entire data room.
- Select the relevant user under “Groups & Users”, click on “Properties” in the right-hand function bar and activate the “Allow WebDAV” checkbox under “Options”. Multiple user selection is possible here.
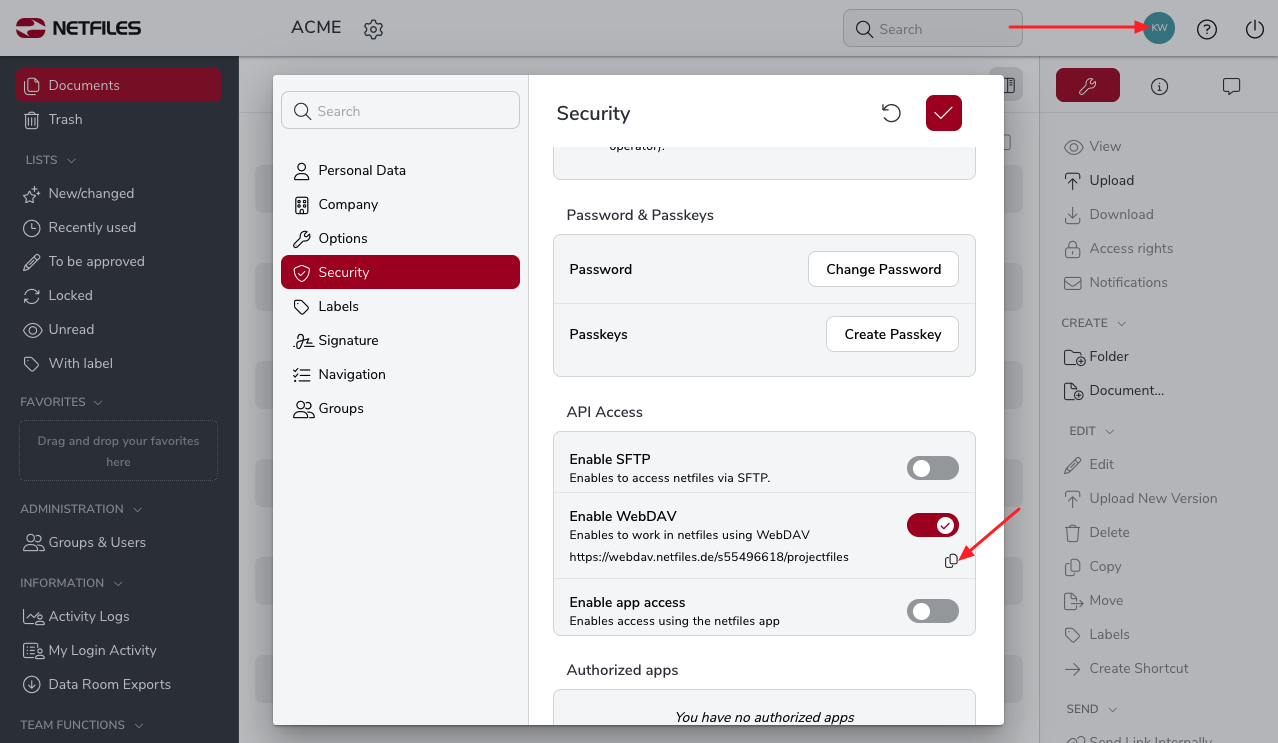
- Click on your name at the top right and then on “Security”. Copy the WebDAV network address there.
Map network drive
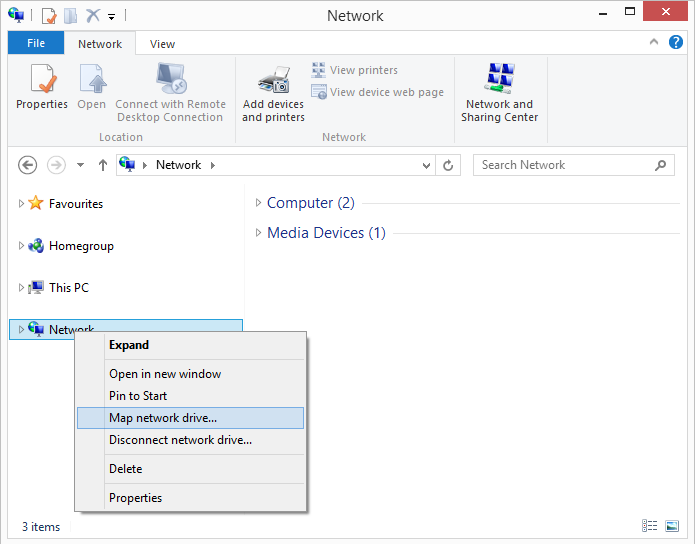
Open Windows Explorer. Right-click on “Computer” or “This PC” and press “Map network drive…”.
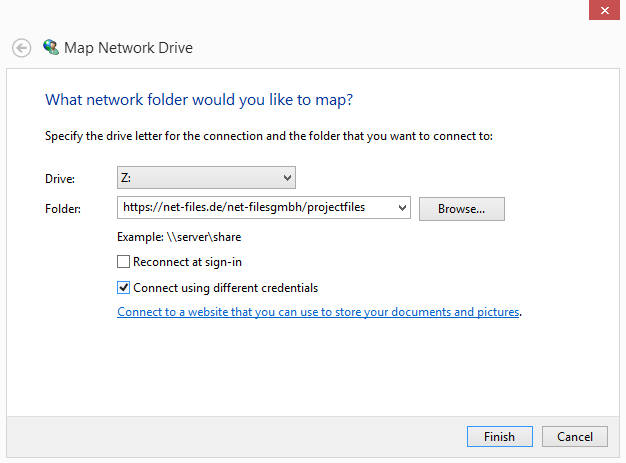
- Check the “ Connect using diffrent credentials” box
- Check “Reconnect at sign-in” optional. If it is activated, the network drive will still be there after the restart.
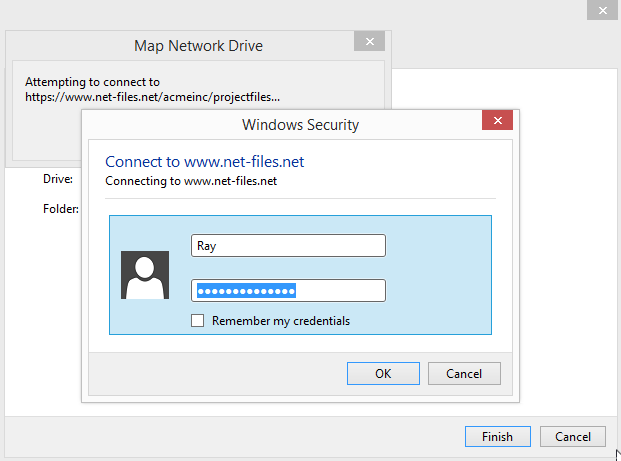
If the connection is successful, you will be asked for your netfiles user name (not your e-mail address) and password in the next step. If you do not remember your user name, you can find it in your “personal data” under your name in the top right-hand corner of netfiles.
Please enter this data and confirm with OK. For security reasons, we recommend that you do not activate the “Remember my credentials” option.
Your netfiles data room now shows up as an additional drive on your computer. You can navigate directly to individual folders in your data room in Windows Explorer, create new folders and upload or download files. You also have direct access to your netfiles folders and files from MS Office applications, for example, and can save files from applications directly to netfiles.
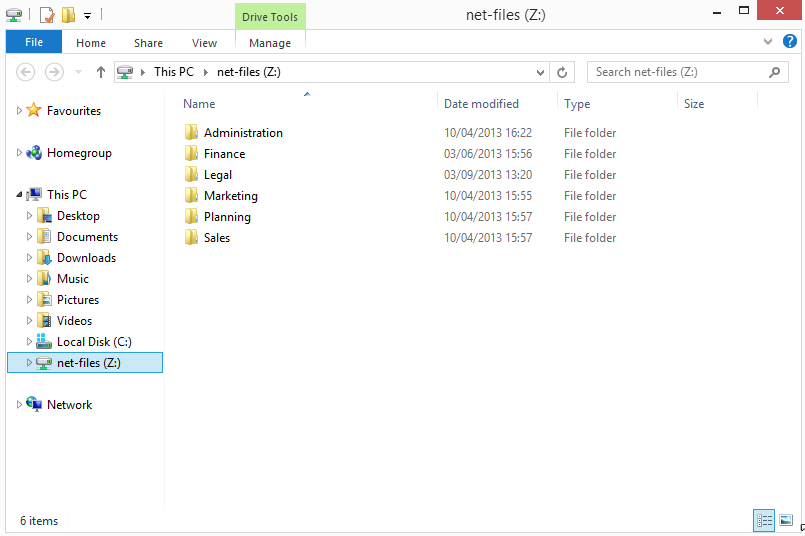
By right-clicking on the name of the new drive and selecting the “Rename” command, you can assign any name to the drive (e.g. the name of your netfiles data room).
By right-clicking on the name of the netfiles drive in Windows Explorer, you can terminate your netfiles connection with the “Disconnect” command. For security reasons, we recommend that you disconnect after working with netfiles.
Problems mapping the network drive
- Mapping is not possible? Are you using Windows 7? Windows 7 only supports the WebDAV network drive if TLS 1.1 or 1.2 or Microsoft EasyFix 51044 has been activated. Reason: Although TLS 1.2/1.1 support is available in the Microsoft WinHTTP interface used, it is deactivated by default. Windows 10 is not affected by this.
- User name Password correct? Check the Setup section above. Check user name and password.
- Microsoft Excel/Word/PowerPoint gives an error when opening the file?
- Check the saved Office login data. Open “ Login Information Management” (you can search for this term in the Start menu), go to “Windows Credentials”, delete the entry “MicrosoftOffice16_Data:SSPI:username” and for “netfiles.com”.
Note
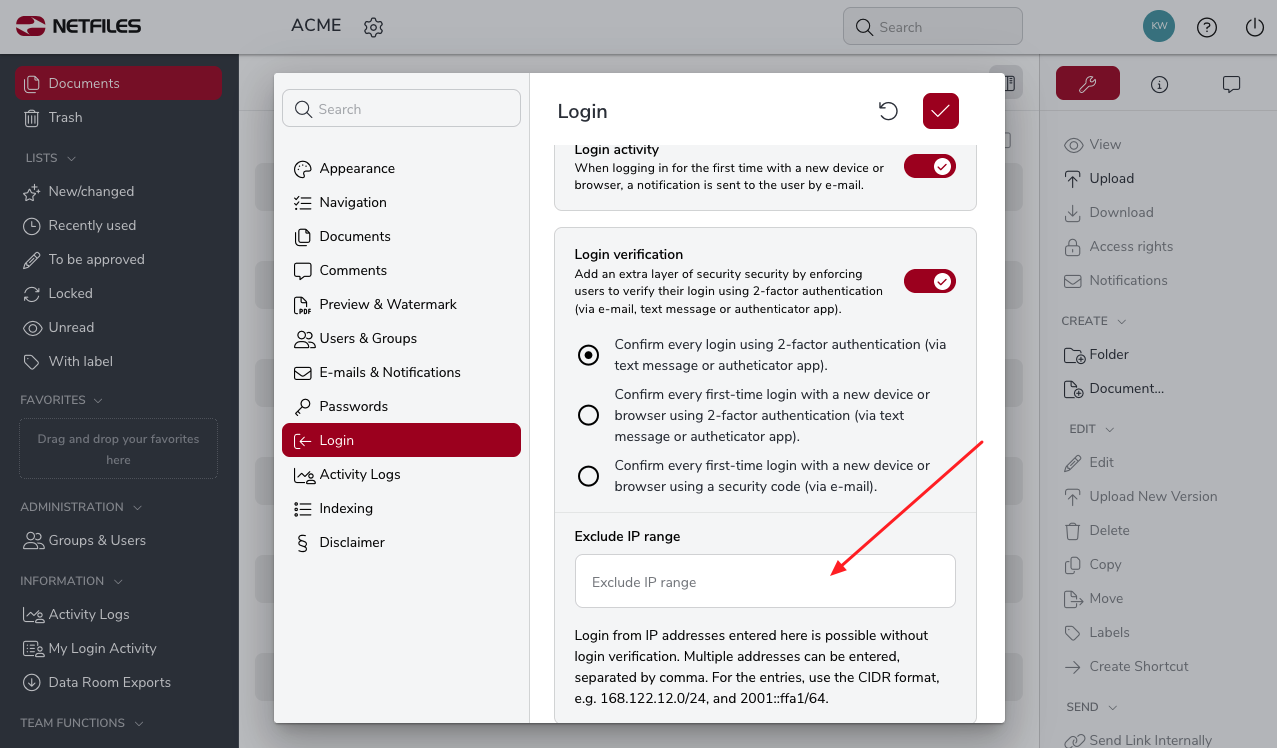
If the WebDav interface is activated in the data room and you would also like to work with 2-factor authentication, please enter the IP address in the data room settings under “Login” in the “Exclude IP range” field.