Automatic user synchronization with an xls file netfiles Enterprise Data Room Premium
You can automatically deactivate users in the enterprise settings using the “Automatic User Cleanup” feature. This article describes how to perform automatic user synchronization based on an xls file. Alternatively, here are instructions for automatically deactivating users whose last login was further in the past than the period you have defined.
Creating the xls file
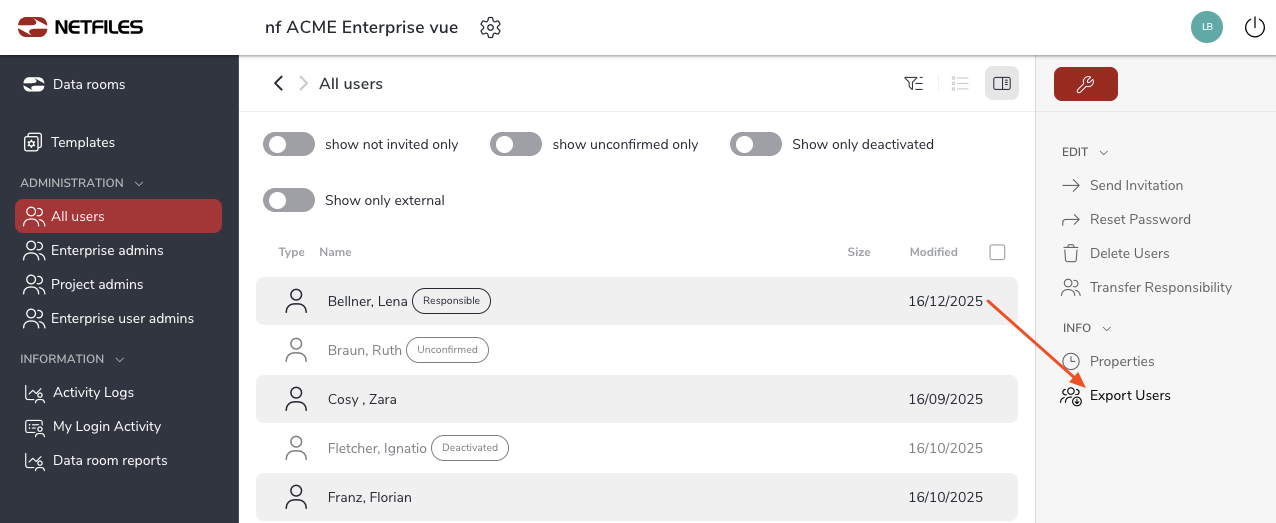
First, you need an xls file containing all the email addresses of all users in the entire enterprise environment. You can generate a list of all users by clicking on “All users” under ‘Administration’ on the left and then on “Export users” on right.
Copy the contents of the “Email” column and paste them into a new xls file. Now filter out all users that you no longer want in the enterprise environment. All domains appearing in this list will then be classified as valid users by netfiles.
Upload xls file
Go to Enterprise Settings and then to the “Automatic User Synchronization” section in the following dialog box and upload the xls file here.
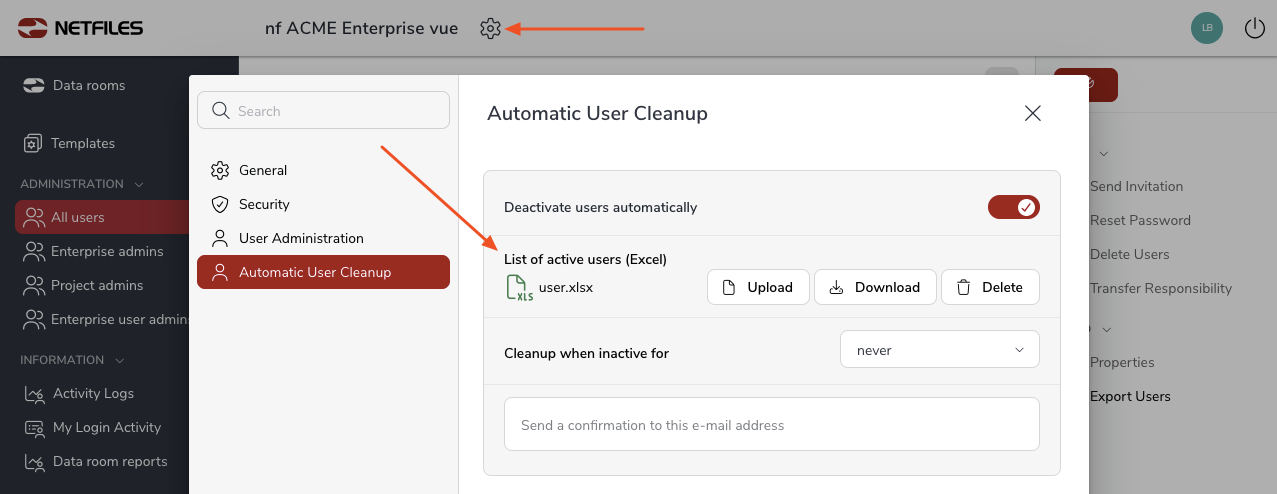
At the next synchronization (once a day), users in the enterprise environment who are no longer on the list will be deactivated.
Reactivate a deactivated user
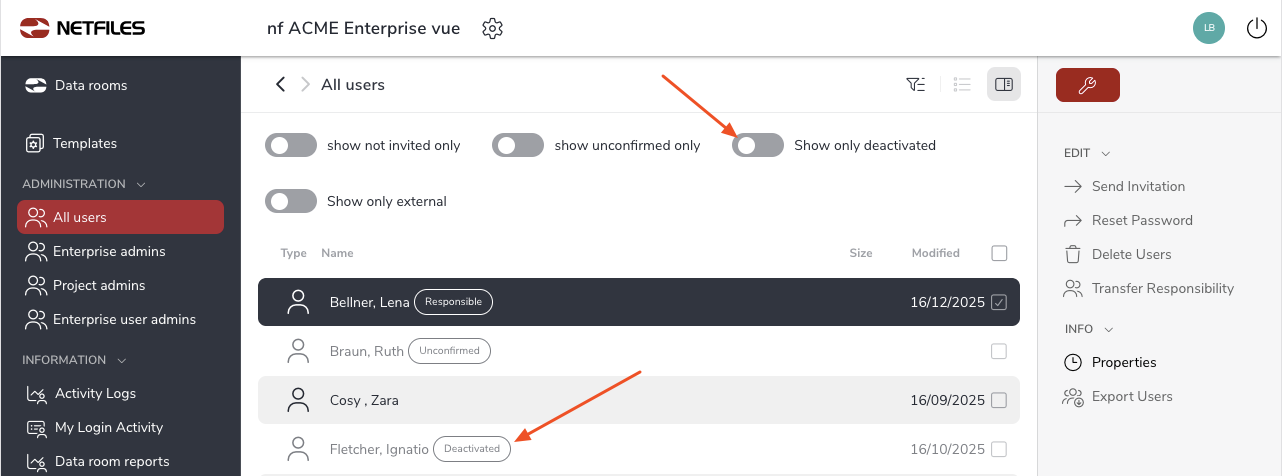
Deactivated users are marked with a “Deactivated” label. In the “All users” area, you can use the “Show only deactivated” filter to display only deactivated users.
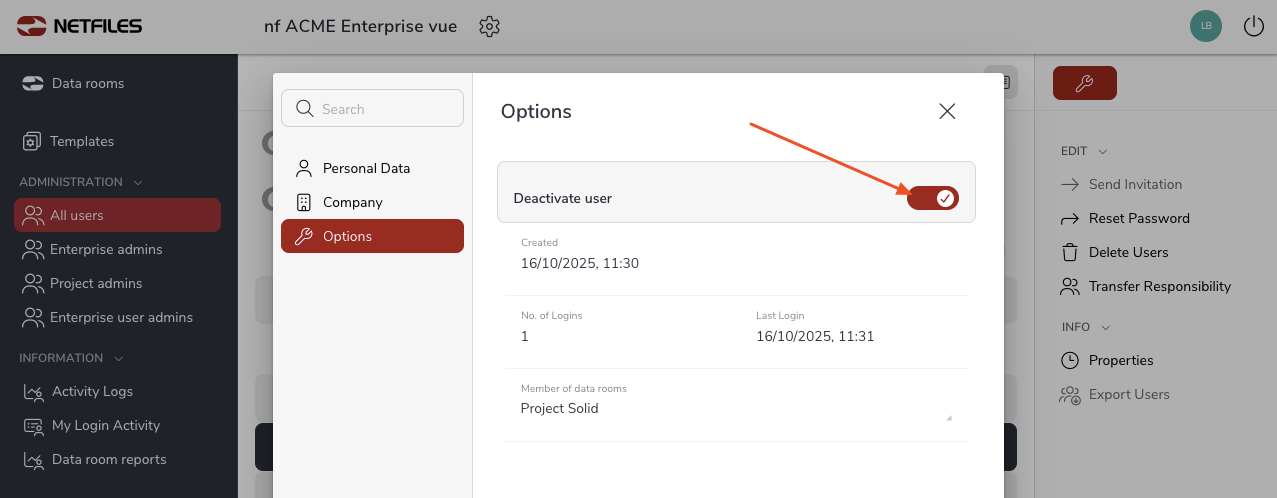
Select a user from the list and click on “Properties” on the right. In the following dialog box, you can uncheck “Disable user” under “Options” to reactivate the user.
-
General
- Introduction to netfiles
- Creating a passkey for netfiles
- Logging into netfiles with a passkey
- Navigation in the data room
- List view, explorer view, icon view
- Login verification 2-factor authentication (Admin)
- Context menu
- Supported web browsers
- Authenticator App for login verification OTP (one-time password)
-
Administration
-
- Interfaces API access
- SFTP Passwordless authentication (Admin)
- SFTP – netfiles integration in Windows (Admin)
- SFTP Technical documentation (Admin)
- WebDAV/SFTP - Client programs (Admin)
- WebDAV - netfiles integration in Windows
- WebDAV Interface (Upgrade new interface)
- Microsoft Office - Editing on WebDAV network drive blocked
-
Data Room Settings
- Appearance settings - logo & colors (Admin)
- Navigation / Features Settings (Admin)
- Documents Settings (Admin)
- Comments Settings (Admin)
- Preview & Watermark settings (Admin)
- User & Groups settings (Admin)
- Emails & Notifications settings (Admin)
- Password settings (Admin)
- Login settings (Admin)
- Activity Logs settings (Admin)
- Indexing settings (Admin)
- Disclaimer settings (Admin)
- Sample disclaimer for the netfiles data room
-
Users and Groups
-
Documents
-
- Send link internally
- External Data Transfer / Secure File Transfer – send
- Sent folder External file transfer
- Activity log External Data Transfer (secure file transfer)
- Sending download links with own e-mail program / external date transfer
- Receive file - External file transfer (secure file transfer)
- Automatic notifications of changes
- Automatic notification of changes (Admin)
- Upload
- Upload ZIP archives
- Download
- Folders
- Comments settings (Admin)
- Comments on folders and files
- Rename folder description and folder
- New document
- Document preview
- Document preview - supported file formats
- CAD Viewer / document preview
- Redact PDF files
- Create private annotations (comments) to files
- Create shared annotations (comments) to files
- Mark unread documents
- Document description
- Copying and moving folders or files
- Create link
- Delete / Trash
- Delete files / Trash (Admin)
- Filter function
- Favorites
- Lists - new, modified, unread, expired and to be approved documents
- Personal labels
- Group labels
- Encrypt PDF files for download (Admin)
- Versioning of documents
- Document approval / release workflow (Admin)
- Open XLSX files in navigable preview
- Setup editing Office documents online with OnlyOffice (Admin)
- Editing Office documents online in netfiles with OnlyOffice
- Editing Office documents together online with Only Office
- Setup editing Office documents directly from netfiles with Microsoft Office (Admin)
- Editing files in netfiles directly with Microsoft Office
- Weitere Artikel (21) Artikel reduzieren
-
-
FAQ
- How can I change the data room name / project name? (Admin)
- Tips and information on security settings in netfiles
- How can I check which documents users/user groups have access to? (Admin)
- How can I control which other users can see a user in the data room? (Admin)
- How can I restrict user access or data room access in terms of time? (Admin)
- Who can see the recycle bin and with what content?
- Why does the document preview not display a document?
- How do I ensure that users do not see each other? (Admin)
- How can I restrict user access or data room access in terms of time? (Admin)
- How can I restrict a user's access to two or more subfolders? (Admin)
- Why is there a red box in front of my file name?
- How do I change my e-mail address?
-
netfiles Data Vault
-
netfiles Enterprise Data Room Premium
-
netfiels Send